Creating real-world objects in Photoshop can be somewhat challenging. The key is to pinpoint and accentuate small details such as shadows, lighting, and extruding edges. In this tutorial, you’ll learn how to achieve acutely life-like telephone dial buttons in Photoshop using shape layers and layer styles!
Step 1
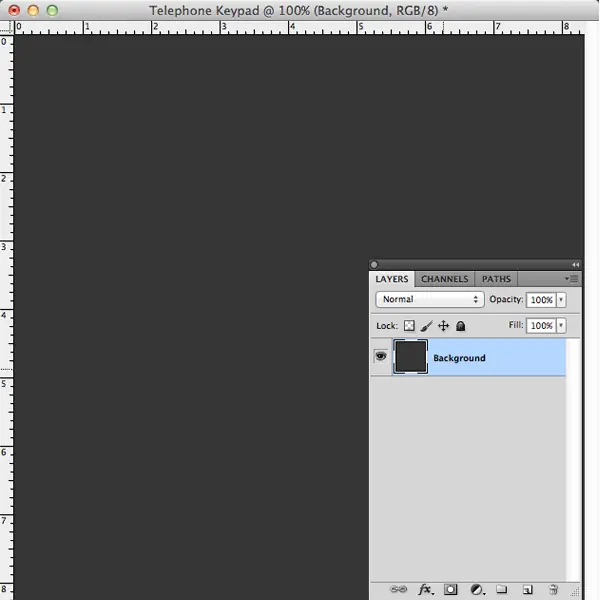
Let’s start with a new document in Photoshop at 600×600 pixels.

Let’s create the keypad’s background. Start by creating a layer called “background” and fill it with a dark color. I used #363636
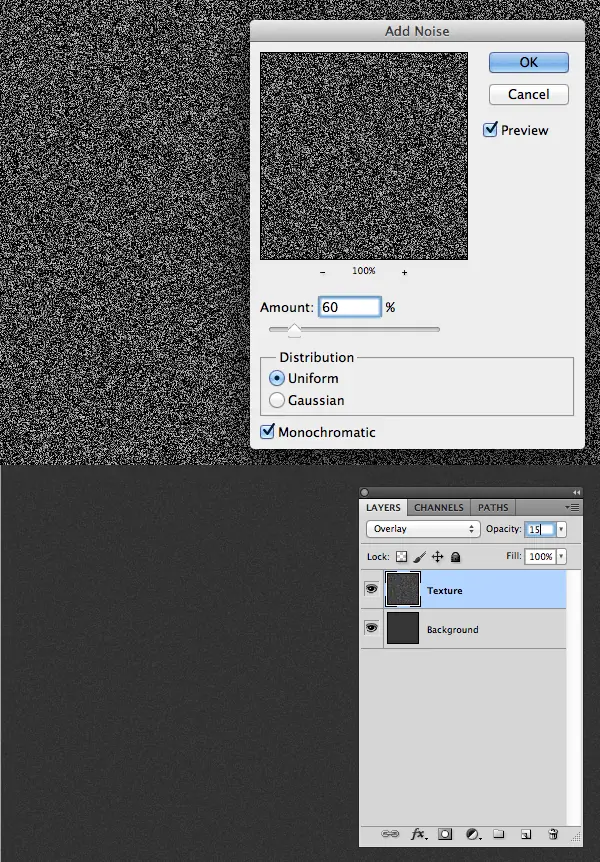
Let’s add some texture to our background. Duplicate the background layer and rename it “Texture.” Go to Filter > Noise > Add Noise, Amount: 60%, Distribution: Uniform, Monochromatic: Checked, Set the blending mode of the “Texture” layer to Overlay and opacity at about 15%.
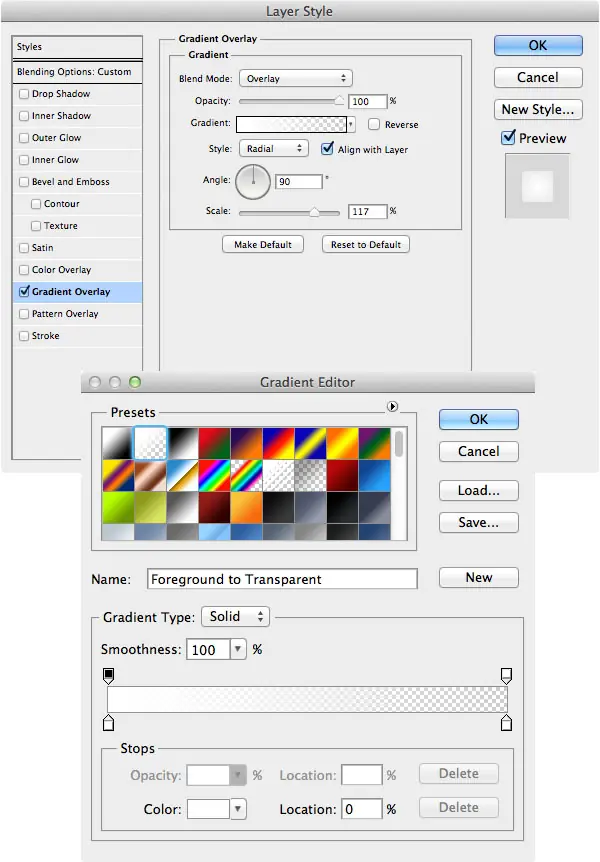
Now let’s add a gradient lighting effect to the background. Set your foreground color to white (keyboard shortcut: press “D” to reset foreground to black and background to white. Then press “X” to swap the two). Duplicate the “Texture” layer and rename it “Gradient.” Set the layer’s fill to 0%. Go Layer > Layer Style > Gradient Overlay, Blend Mode: Overlay, Style: Radial, Angle: 90, Scale: 117%, Set the gradient color to foreground to transparent (this is why we set our foreground to white). Set the blending mode of the “Texture” layer to Overlay and opacity at about 15%.
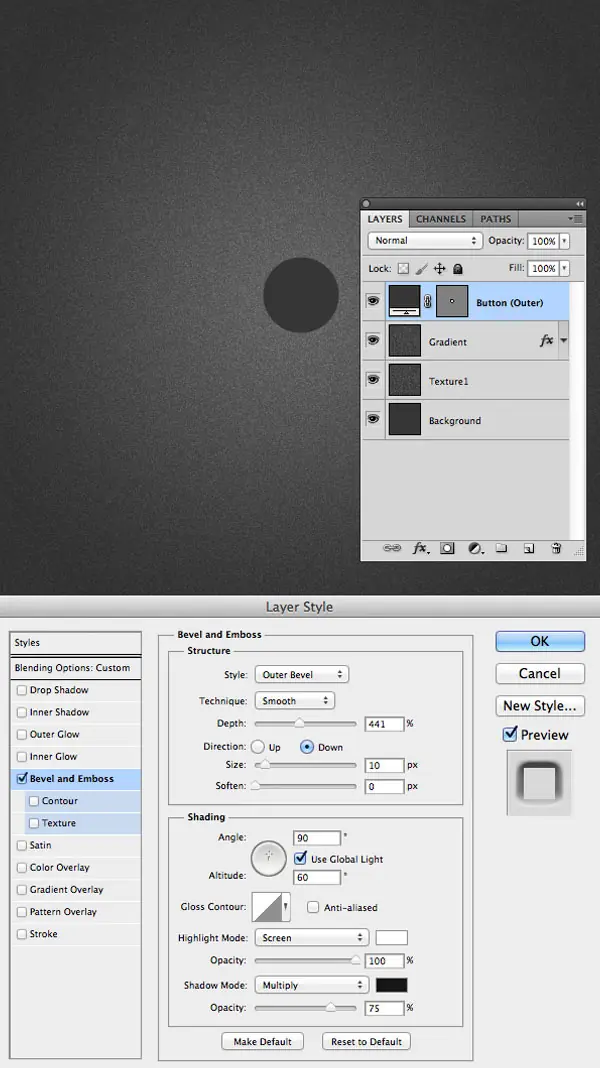
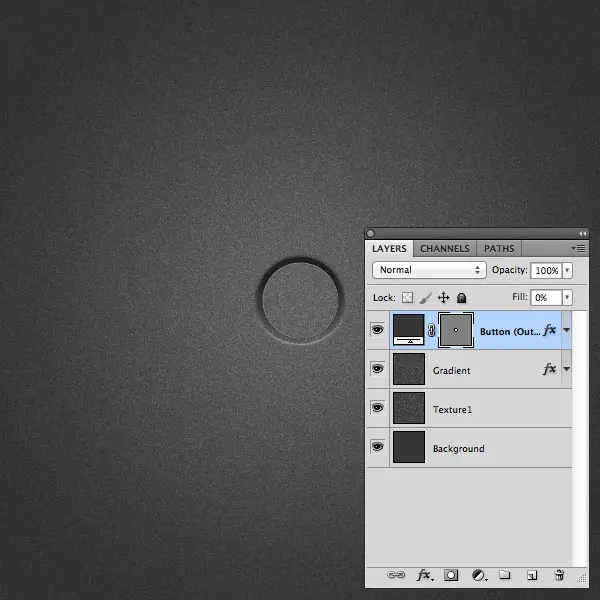
Now let’s start on creating our dial buttons. Use the ellipse to create a small circle. This will be the outer shadow of the button so I named the layer “Button (Outer).” Mine is about 76 pixels. Set the layer’s fill to 0%. Go Layer > Layer Style > Bevel and Emboss, Style: Outer Bevel, Depth: 441%, Direction: Down, Size: 10px, Angle: 90; Altitude: 60; Global Light: Checked. Set the blending mode of the “Texture” layer to Overlay and opacity at about 15%.
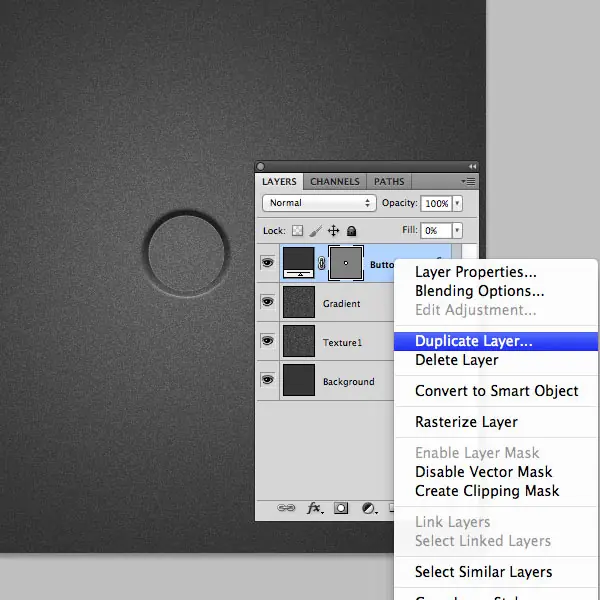
Let’s create our inner button now. Duplicate the “Button (Outer)” shape and rename it “Button (Inner)”. Be sure you duplicate it so it appears in the exact same spot as our shadow button. You can do this by right clicking on the layer in the layers panel and selecting duplicate layer.

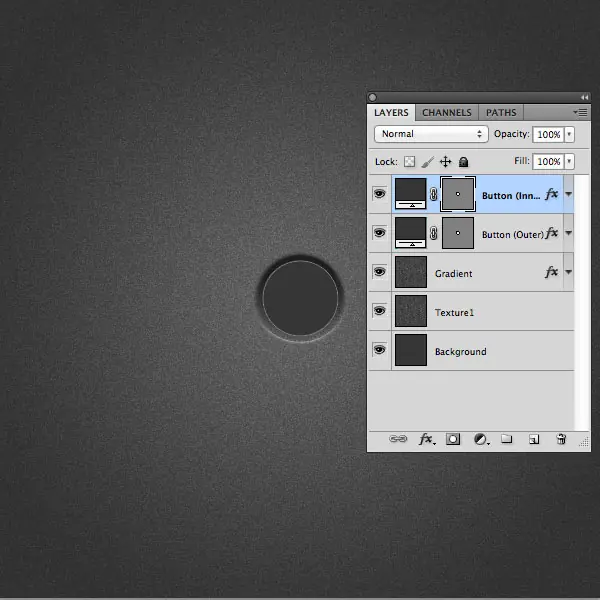
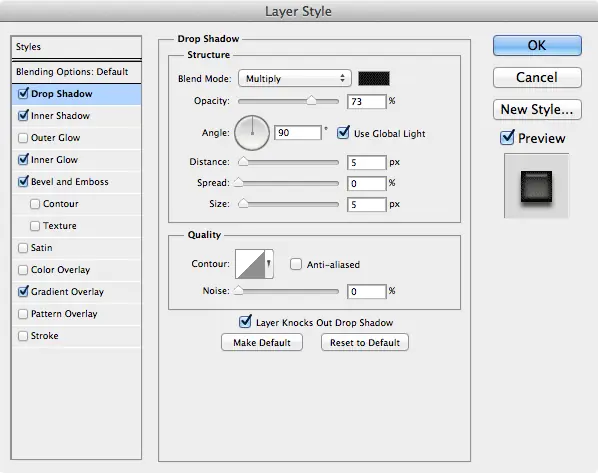
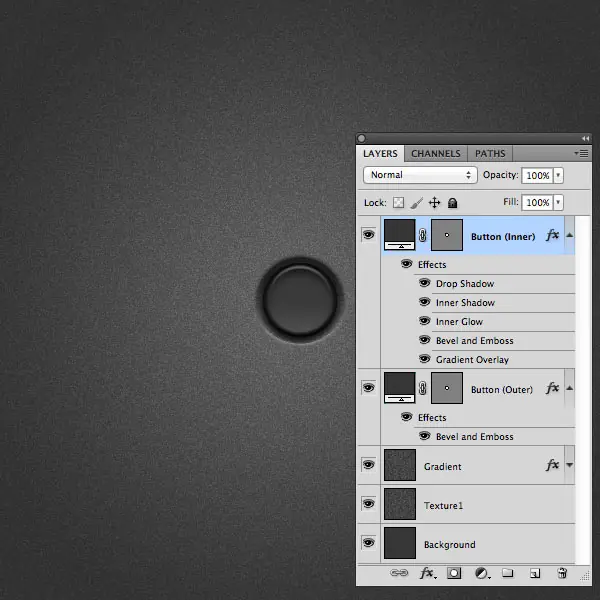
Now that we have our inner button in place, let’s adjust our layer styles to give it a more realistic look. First, we’ll start with the drop shadow of the “Button (Inner)” shape layer.
Now let’s adjust the inner shadow of the “Button (Inner)” shape layer.

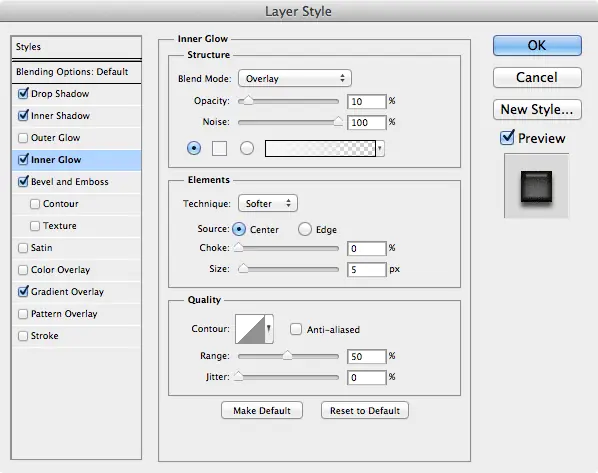
Now we’ll adjust the inner glow of the “Button (Inner)” shape layer. This will give a little texture to our dial button.
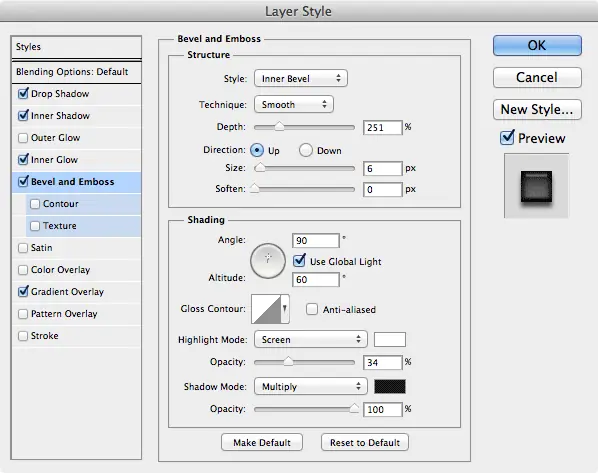
Now let’s change the bevel and emboss settings of the “Button (Inner)” shape layer. This is what gives our button a more realistic, three dimensional shape.
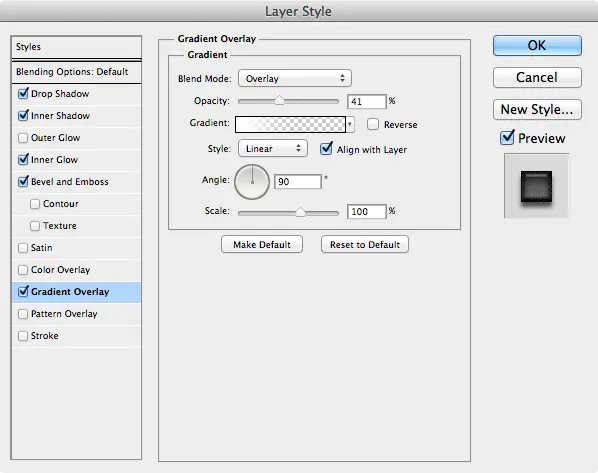
Now let’s change the gradient overlay settings of the “Button (Inner)” shape layer. This gives our button a slight highlight on the bottom.
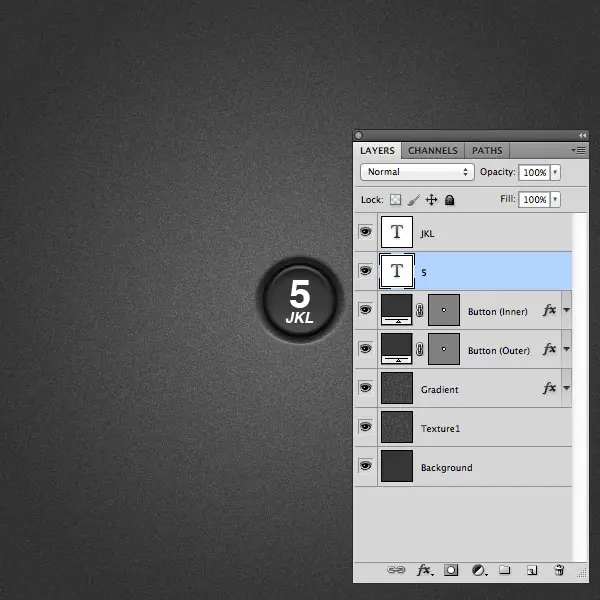
Let’s add our numbers and letters to the dial now. Simply use the type tool to create your number (I used 40pt Helvetica). Then, using the type tool again, create your letters (I used Helvetica 15pt Oblique).
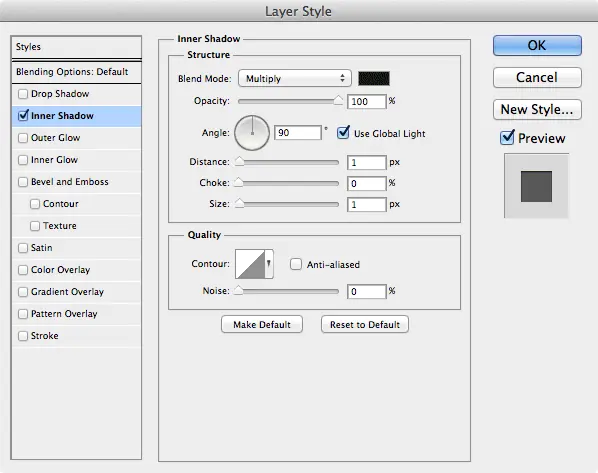
Now, let’s add a slight inner shadow to the layer styles of our number and letters.

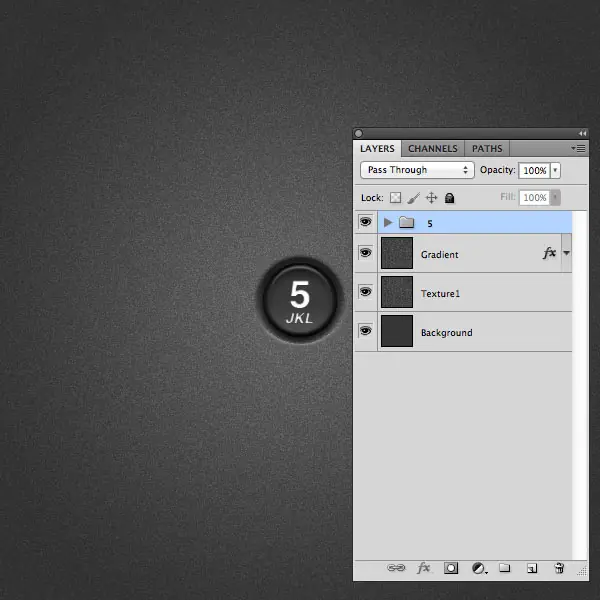
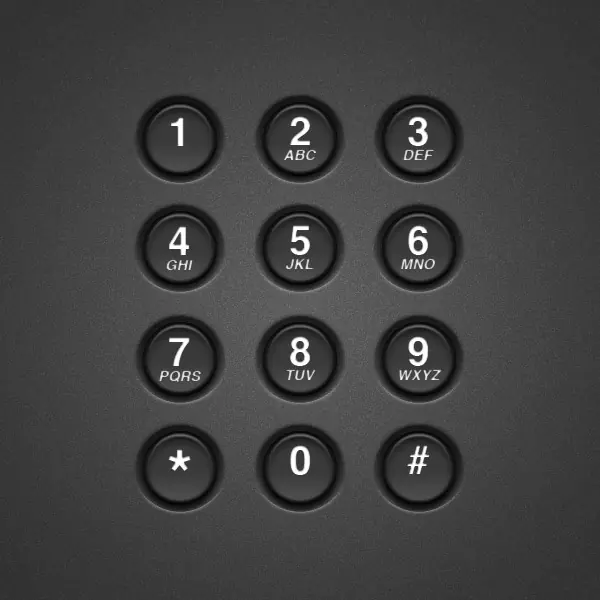
Now you can simply duplicate the group layer and change the numbers and letters as needed! You can use the final image as a reference to see what numbers correspond to which letters (if you don’t already have it memorized).
You’ve just created a realistic telephone keypad using pure layer styles! Hopefully you can employ the skills you’ve learned here in future projects to help add a bit of realism to your design elements.